Monday, November 25, 2013

Thankful Tree

Hey Everyone! We are so excited to have moved over to a WordPress site! It gives us a lot more options and we think you will enjoy it! Head on over to 
to continue following us! See you there!

"Gratitude turns what you have into enough"

So much of the holidays have become about "what can I get for myself? What do I deserve for being good?"

It's important for us to spend time reflecting on what we have, and see all the things that God has blessed is with.

This year, we decided to make this a very visual gratitude craft to display. Here is our gratitude tree- filled with things that our Heavenly Father has blessed us with. Hopefully this will help us turn our hearts away from the commercializations of the holidays and focus on just GIVING THANKS!

It wasn't hard to put together. We just went outside and trimmed our tree. We stuck the branches in a mason jar and tied a cute ribbon around it. Using fall color paint chip samples, we cut out circles, hole-punched the top, & hung them from the branches with twine. Here's how it turned out!


What are things that you will put on your gratitude tree? If you aren't making one, what are some ways that you have "given thanks" this time of year?

-Karianna


Thursday, November 21, 2013

New Blog Location!

Hey Everyone!
Just wanted to let you all know that we have MOVED to a new site!

Please follow us at

http://kirstenandkarianna.wordpress.com/

We will continue posting our fun adventures there!

Monday, November 18, 2013

Buttermilk Pumpkin Waffles

Hey Everyone! We are so excited to have moved over to a WordPress site! It gives us a lot more options and we think you will enjoy it! Head on over to 
to continue following us! See you there!


One of my very favorite things about Fall, are all the pumpkin baked goods.  As far as autumn is concerned, it's greatest achievement, in my opinion, is the pumpkin.  Absolutely nothing communicates fall like a good pumpkin, and nothings tastes as much like fall as something with pumpkin baked into it. So when the weather turned cold and stormy this past November week, I decided it was time to bust out a can of pumpkin puree and make some waffles.

My recipe is similar to the one found here from Smitten Kitchen.  But I've made some changes to the recipe that sweeten up the batter a bit and bring out the awesome pumpkin flavor.  

What you need:

2 1/2 cups all-purpose flour
2/3 cup packed light brown sugar
2 1/4 teaspoons baking powder
1 teaspoon baking soda
1 teaspoon salt
1 Tablespoon ground cinnamon
1 teaspoon ground ginger
1/2 teaspoon ground cloves
4 large eggs, separated
2 cups well-shaken buttermilk
1 teaspoon vanilla
3/4 stick (6 tablespoons) butter, melted
1 cup canned solid-pack pumpkin

Combine the flour, sugar, baking soda, salt, cinnamon, ginger, and cloves. 


Whisk the egg yolks, buttermilk, vanilla and butter together until well blended.  Add in the pumpkin and incorporate well.


Then add the dry ingredients until just combined.


Whip the egg whites until semi-stiff peaks are formed.  It will require some swift whisking to get the egg whites stiff so its best to use a mixer if possible, a hand mixer is fine too.  Once the egg whites are stiff, fold them into the batter.


Now you are ready to cook your waffles.  I cooked mine in a basic waffle maker, using about 1/4 cup of batter at a time.  Make sure you properly grease your waffle iron to ensure a smooth dismount for your waffle.  I also like to preheat my oven to about 250 and put my cooked waffles in there on a pizza tray or even cookie sheet to keep warm and crisp.  

I like mine with a bit of fresh whipped cream on top.  It's great with syrup, butter, powdered sugar or any other favorite waffle topping.  

I hope you enjoy this recipe.  Let me know if you have any suggestions of your own.  


Friday, November 15, 2013

Fall Glitter Leaves Banner

Hey Everyone! We are so excited to have moved over to a WordPress site! It gives us a lot more options and we think you will enjoy it! Head on over to 
to continue following us! See you there!

We had so much fun creating this upscale (for us any way) fall craft we found here.  The dark, fallish glitter makes the whole banner look extra swanky.  This is the kind of fall decoration that will class up even the most basic of construction paper Thanksgiving decor.


Here is what we used to put together this craft:

-leaves (we plucked ours off of some clearance fall garland) 
-hot glue gun
-scissors
-glitter (small & large chunks for variety)
-brown ribbon
-adhesive spray
-newspaper
-vegetable oil (for clean-up)


1- Take leaves and spray them with adhesive spray. 
2- Lay leaf on top of newspaper and sprinkle with glitter. Let the glitter settle for a minute, lift up the leaf and tap the glitter off and set aside to dry. Repeat to back side. We did 14 or so leaves per banner. 
3- Once all your leaves are done, cut varying lengths of ribbon (3 to 5 inches) and hot glue to the back of each leaf.
4- cut a long piece of ribbon (we did 5 feet) and begin to tie your leaves to the main ribbon. Take care to have your leaves tied forward so they lay better.

And enjoy!

A couple points of interest: First, for as awesome as this project turned out, it was about as fussy to make as it looks.  Basic assembly for a craft, sure, but glitter and glue are a special combination that can quickly get out of hand.  So when you've finished spraying and sprinkling, pour a hand full of vegetable oil on those sticky digits and that glue and glitter will glide right off. 

This picture doesn't even do justice to how glitter-gooey we got!

Second, our first attempt to attach the ribbon to the leaves had us punching holes in the leaves using a combination of safety pins and pencils.  Yeah...., not only was that time consuming, but the end result wasn't as polished as we wanted.  So, out came the hot glue, and we learned a vary valuable lesson.  When in doubt, hot glue.


Third, don't despair if at first you don't succeed.  It took us a couple of tries to get the glitter and glue just right.  But it was worth it.  The final result is one of our favorite crafts of all time. So be brave, and glitter on. 


Happy Thanksgiving!

Monday, November 11, 2013

13 Christmas Traditions to start in 2013

Hey Everyone! We are so excited to have moved over to a WordPress site! It gives us a lot more options and we think you will enjoy it! Head on over to 
to continue following us! See you there!
If you are like me, you love Christmas time as outrageous amount. However, I feel like every year, my busy life gets in the way of being able to celebrate. I am determined to make this year a memorable one, since it will be Evelynn's first Christmas.These 13 traditions to start (or continue) in 2013 will help keep my mind focused on this wonderful holiday season and will create memories that will last a life time!


These are things that anyone can begin. Whether you are a newlywed, or nearing the end of your life, whether you have kids or not. Heck, even if you live with a bunch of college roommates, or by yourself, pick a few of these fun traditions to start and make your holiday season ROCK!

1- Put up Christmas lights:
This is a very important part of making Christmas feel like, well, Christmas. Make it a tradition to put up all the lights with your whole family. If you have kids (or a husband), get them excited by letting them help pick out the lights, or rediscovering the ones you used from last year. If you have older kids, have them jump up on the roof for some additional fun. Offer hot cocoa and cookies to them when they are finished. Coming home every night to the house being lit up will for sure help bring on the Christmas spirit! Here are our husbands and Kirsten's son putting up the lights on our duplex. Bring it on, day after Thanksgiving. We are ready to shine on!


2- Decorate the Christmas tree:
In my family, my parents always were sure to have everyone together while we decorated the Christmas tree. It was a great activity for us all to do. Despite the few years that we protested this "chore", it is definitely one of my favorite traditions that we would do together. I plan to continue this with my own family. To help keep the attention of those who are less interested, this would be a great time to share with your kids the meaning behind all those ornaments you collected, and get them extra excited for Christmas. Again, a key part in making this exciting for the whole family, is allowing them to help you in some sort of way. Whether its letting them pick out the decor or rotating who gets to put up the star or turn on the lights for the first time. What ever you decide, get them involved!

3- Make Stockings:
This is something I have never done, but thought would be a great tradition to start. Every year, pick a simple pattern for a stocking and have each family member make one! Afraid of sewing? Buy plain stockings and decorate them or add names with fabric paint. What a fun way to personalize your stockings, and have a fun craft for your family to do each year. You could even go crazy and make one for the dog!

4- Gingerbread Houses:
What could be more fun than a miniature fun house made of CANDY? I'm not sure if anything in this life compares. Also, one of my favorite traditions. How could it not be when my family always went ALL OUT! We're talking, homemade gingerbread, homemade frosting glue, any candy you could ever think of, and not just homes decorated, but full yards! To help the boys stay interested, they did theme houses. A Zombie apocalypse or one with a gummy bear rock concert in the front yard. If this all seams too complicated to start, begin with graham cracker houses or pick up a kit from Costco (our favorite store). Be creative and HAVE FUN!

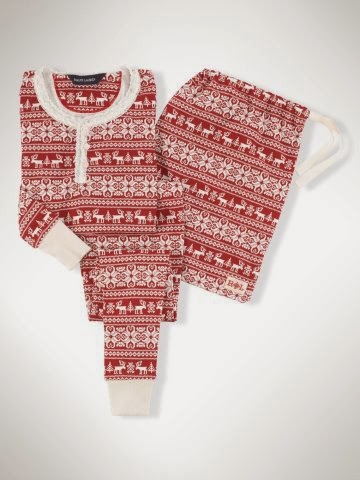
5- Christmas Eve pajamas:
I know this is a tradition that many of you already have. I have never had this tradition in my family, but I can always start this year. There is something that seams so magical about putting on a new pair of pajamas the night St. Nick is to arrive. I'm thinking this year, if I get ambitious, I would love to make pajama bottoms for myself, Mike, and Evelynn. We'll see though. I may err on the slightly lazy side and pick up some cute jam jams from the store. Check out these adorable PJs that are definitely way more money than I would like to spend. Found on http://wanelo.com/p/2500624/reindeer-pajama-set


6- Cookies and Milk:
Whether your kids believe or not, it is always fun to leave cookies out for Santa. This is not something that we did every year growing up, but what a great way to add a little magic in the home! Such a traditional tradition that excites the kids, and feeds the hungry, sleep deprived parents. Bake your favorite chocolate chip or spend time decorating some sugar cookies. Whatever you decide, do it as a family. 

7- Christmas book on Christmas Eve:
Pick your favorite Christmas book and read it to your kids at night. There is nothing like sitting around the tree with your family and opening a real life book! Christmas Eve is a good day for those T.V.'s, Ipads, and other electronics to take a break. 

8- 25 days of service:
Make a list of things that you want to do to serve others. Have a family list or have each person make their own. Some ideas for a family list could be: volunteer at the homeless shelter, make neighborhood gifts, find a family in need and bring them dinner, donate your gently used toys or buy new toys for a charity. If you are having each person make their own list, add things like, make bed for sibling, shovel someone's driveway, or sit by someone who needs a friend. 

9- Make candy:
I wish I had the recipes to share right now, but I will have to add a link in later. However, I know Pinterest has a million recipes for homemade candy. Growing up, we always made caramels, fudge, and divinity. Definitely one of the most rewarding things is biting into some fudge that you made from scratch!

10- Make snowmen or snowmen doughnuts:
Put on those hats, gloves and snow boots for this activity. And, if you live where it snows, this can be done in the convenience of your own front yard! and its TOTALLY FREE! Get creative and make a "snow family" or a "snow dog". No snow? No problem! Check out these awesome Snowman doughnuts you can create as a fun holiday snack from http://yourlittlebirdie.blogspot.com/!


11- Drive around to see Christmas lights:
Pile the whole family in the car and drive. Drive to see all the cool displays that other families put so much effort into creating. There are several homes in our area with lights that dance to music. They seam to be popping up all over the place! I like to think of driving to see Christmas lights as the winter version of star gazing. 

12- Christmas Bucket List:
If your like me, there are too many fun things to do during the holiday season. Use some of these traditions listed, along with other activities or events going on in your community to create a bucket list so you can be sure to take advantage of the fun. Some things that will be on my Christmas Bucket List are: Find an ugly Christmas sweater to wear, bake Christmas cookies, donate to the food bank, find an ornament for our 3rd Christmas being married, visit Temple Square and see the amazing light display, and drink hot cocoa by the tree.

13- Name things that you are grateful for before opening each gift:
I feel that these days, Christmas is over-commercialized. Don't get me wrong, I LOVE all the fun decorations and gift giving. But sometimes, its good to remember the true meaning of Christmas. It's the day we celebrate the birth of our Savior, Jesus Christ. I think that too often we get caught up in all the presents, but how great would it be if we put a little more focus on gratitude.
Growing up, we always had one person open up a gift at a time. Before opening a gift, we were to say something that we were grateful for. This does take a long time, but it was a great lesson my parents were teaching. Patience, gratitude and realizing that Christmas isn't all about ME are a few things that I learned. 


And there you have it. A list of some fun traditions that you can start with your family. What are some traditions you like to do with your family? What are some you would like to begin?

Happy Celebrating!
-Karianna


Saturday, November 9, 2013

Fall Wreath

Hey Everyone! We are so excited to have moved over to a WordPress site! It gives us a lot more options and we think you will enjoy it! Head on over to 
to continue following us! See you there!
One of my favorite ways to get my craft on is to put together a wreath. It's so easy and makes your door look extra stylish.

Your best friend with wreath making is your hot glue gun. Keep it close!


To make this one, you need to make a trip to hobby lobby!

I got the plain twig wreath with a coupon for around $4

I waited or the flowers to go on sale and picked out some of my fav fall pieces! ♥Check out that burlap flower! ♥

And the cute orange chevron ribbon I purchased with a coupon for around $3

To make:
Grab your ribbon and go! Hot glue it all around the twig wreath. I had to hot glue on the underside, as well as in the folds I created. 
Then, I just added flowers! Again, hot glue gun = BFF 

Easy peasy. 
-Karianna


Friday, November 8, 2013

Chocolate Pudding for the Soul

Hey Everyone! We are so excited to have moved over to a WordPress site! It gives us a lot more options and we think you will enjoy it! Head on over to 
to continue following us! See you there!
One of my favorite desserts in the whole world is warm homemade chocolate pudding over vanilla ice cream.  That particular dish speaks to my soul and satisfies more than just my sweet tooth, and fall is the perfect season to break this delectable comfort food out.  

Kirsten's Homemade Chocolate Pudding


What you need:

3 cups milk (whole milk is best but any you have will do)
1/3 cup  granulated sugar
2 tbsp. cornstarch
2 tbsp. unsweetened cocoa powder (I add a touch extra to make it sinfully chocolately)
1/4 tsp. salt
2 large egg yolks
3 oz. dark or semi-sweet chocolate, finely chopped (I also use semi-sweet chocolate chips, although it can end up a bit grainy depending on the quality of the chocolate chips.)
1 tsp. vanilla extract


Whisk together 1 cup of milk with the sugar, cornstarch, cocoa powder and salt. When well blended, whisk in the egg yolks. Set aside.

In a large saucepan, bring the remaining 2 cups of milk to a boil over medium heat (stir frequently or you might scorch the bottom, as I'm prone to do from time to time). As soon as the milk comes to a boil, reduce the heat to low and simmer. Gradually whisk in the egg mixture, stirring quickly until well blended. Continue cooking and stirring until pudding thickens enough to thickly coat the spoon, about 5 minutes. 


Remove from heat and stir in the chopped chocolate until it is melted and the pudding is smooth. Stir in the vanilla extract.


I hope you enjoy one of my all time favorite recipes.  May it warm your soul as much as your tummies!
-Kirsten